Compile Commands
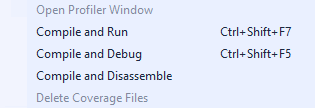
There are a number of commands in the Visual D menu that allow you to work with a single D source file without creating a project.

Compile and Run
This command will compile the current text window that has the edit focus. Compile options are taken from the active project configuration if the file is part of a project in the current solution. In addition options given in the global settings are added to the command line. Instead of building the full project, rdmd is used to just add the minimal dependent modules. In order to build a runnable exectuable, you might have to add a main function to the source file or add -main to the global options.
One use case for this feature is to run unittests of a single module. Compilation errors, program output and exception trace will be visible in the output window and can be double clicked to jump to the shown code locations.
When used on a source file not found in any of the projects in the solution, default options from the ConsoleApp project template are used to build the executable with rdmd. This allows script like usage of D files from within the IDE, though there is currently no way to specify execution arguments.
Compile and Debug
This command is similar to "Compile and Run", but instead of running the compiled executable immediately, the debugger is started to allow further inspection. If you want to trace execution from the very beginning of the program, you should set a breakpoint at the start of main before issuing this command.
Compile and Disassemble
While optimizing code, it is often useful to take a look at the assembly generated by the compiler. This is usually done by compiling a program, starting it in a debugger until it hits an appropriate breakpoint. The disassembly view will then show the desired machine instructions.
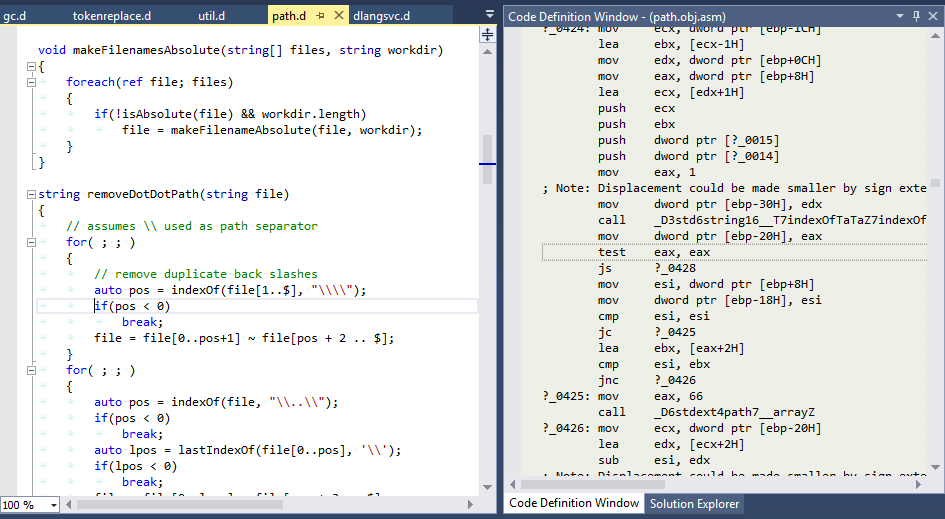
This can be a tedious and time consuming process, when all you want to look at is the disassembly of the currently written lines of code. The "Compile and Disassemble" command can take the pain out of this workflow, as it will just compile (not link) the current module with the command line options of the active project configuration and then show a disassembly dump in the Code Definition Window. It automatically synchronizes the instructions shown in the disassembly with the current caret location in the editor.

It's best to assign a keyboard shortcut to the "VisualD.CompileAndDisasm" command to easily update the disassembly view after making changes to the source.
Dumping the assembly of an object file is done by an external command line tool that can be configured for each tool chain in the global settings. For Win32, the generated object file format is rather dated OMF that is not very well supported anymore. The commercial version of the Digital Mars C++ compiler contains the command line tool obj2asm, but you can also use objconv by Agner Fog. For any other target or compiler platform, the generated object file format is COFF, that can be disassembled with the Microsoft tool dumpbin that comes with Visual Studio. In case you use Visual D to cross compile for other architectures with LDC or GDC, you might have to run the appropriate tools from these compiler suites instead.
These are working settings for the "Disassemble Command" option, but you might want to tweak these for different output, e.g. switch between AT&T and Intel style assembly. Make sure that instruction offsets are displayed so synchronization with the editor works with the help of debug line number information.
DMD/Win32
obj2asm -x "$(InputFile)" >"$(TargetPath)"This assumes obj2asm can be found in through PATH. If this is not the case, please add the full path to it. The same replacement macros can be used as in the project configurations. For objconv, this command is
obj2conv -fasm "$(InputFile)" "$(TargetPath)"
DMD/Win64
"$(VCInstallDir)\bin\amd64\dumpbin" /disasm:nobytes "$(InputPath)" >"$(TargetPath)"
DMD/Win32-COFF
dumpbin executables can be used for both architectures x86 and AMD64, no matter what architecture they are executed on, so you can use the same setting as Win64, but in case you are restricted to a 32-bit OS, the respective executable can be found in the bin folder of the VC installation:"$(VCInstallDir)\bin\dumpbin" /disasm:nobytes "$(InputPath)" >"$(TargetPath)"There is one gotcha: dumpbin needs a DLL for doing the disassembly that is installed to $(VSInstallDir)\Common7\IDE (in VS 2013), so make sure you have this directory listed in the "Executable Paths".
LDC
dumpbin works here, too, for the x64/AMD64 architecture, but in case you want to use LLVM tools for other architectures, you'll have to change the default setting:llvm-objdump -disassemble -x86-asm-syntax=intel -no-show-raw-insn "$(InputPath)" >"$(TargetPath)"You'll have to add the path the LLVM tools to the "Executable Paths" or to the llvm-objdump command.
GDC
Similar to LDC, the alternative command isobjdump --disassemble "$(InputPath)" >"$(TargetPath)"